Do a Quick & Easy Seed Germination Test
by Arzeena Hamir
If the holidays have pretty much wiped you out, here is a simple activity that will not only save you money but will help organize your garden for the upcoming year.
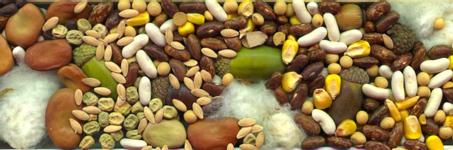
Like many gardeners, my stash of seeds has accumulated over the years to the extent that I often forget what varieties I’ve bought. Some of these seed packets date back several years so before I take a chance, basing my whole crop of sweet corn on that package from 1997, I do a germination test. A test can be done on as few as 5 seeds but a more accurate prediction of germination percentage requires at least 20 seeds.
I use a very low-tech method of germinating seed: damp paper towels and plastic bags. Moisten one towel and arrange your seed on the sheet. If the seed is large (peas, beans, corn), apply another moist towel on top and roll the 2 sheets together into a tube. If the seed is small, the sheet can be folded over and then rolled onto itself. Once rolled, the paper towel should be placed inside a plastic bag or Ziploc to keep it from drying out. Finally, place the plastic bag in a warm spot (on top of the VCR, in the kitchen, on top of the fridge).
Before rolling the sheets, make sure the seeds are not too close to each other. Seeds that don’t germinate can begin to mould and this mould will infect nearby seeds if they’re too close or touching.
After about 2 days, check the paper towel at least once a day to see if the seeds have started to germinate. If the towels have started to dry out, re-moisten them with a couple of drops of water. Most seeds will germinate within 5 days at room temperature.
The majority of vegetable seeds will keep for at least 3 years if they’ve been kept cool & dry. The types of seed that don’t store well include sweet corn, parsnips, Swiss chard, spinach, and members of the Allium family (onions, leeks, scallions, chives).
The percentage of seed that do germinate in the towel will give you a pretty good idea of how they’ll do in the garden. If only 50% of the seeds germinated in the towel, you may want to consider planting the seed closer together to compensate for the seeds that don’t emerge. Alternatively, you may want to peruse your favourite seed catalogue and replace that seed package.
Finally, being the frugal gardener that I am, I hate to see a germinated seed go to waste. I pot-up whatever I can and keep them growing under lights. In the case of root crops, I plant the pre-germinated seed directly in the garden. I get a much better stand by doing this, especially if the soil is still slightly cold and would have caused un-germinated seed to rot.
Gardening Activities for January
- Cut up your Christmas tree and use the branches as a mulch over perennials and around shrubs.
- Inspect perennial beds for heaved plants during warm periods. Mulch around heaved plants but don’t push them into the soil! Dig and replant them in the spring.
- By mid-month, test your onion, leek and chive seed. Start growing the seeds that do germinate under lights.
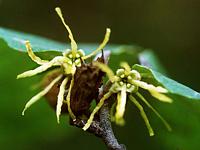
- At the end of the month, begin to select flowering tree & shrub branches for forcing. Suggested plants: forsythia & vernal witch hazel.
Controlling Slugs and Snails
by BZ Riger-Hull
Slugs and snails are molluscs of the class Gastropoda that literally means ‘stomach foot’. Gastropods, form the second largest class in the animal kingdom, insects are the largest. For the most part they are hermaphroditic. They contain both male and female reproductive organs, allowing them to mate with any mature animal of the same species.
Slugs are gray to black or brown and soft-bodied, often with a soft hump in the center; snails have a hard calcium shell. Eggs are round, clear, and less than 1/4 in diameter, often with a thick outer shell of calcium carbonate; laid in clutches of three to 50, with some species laying as many as 500 per year. Living throughout North America, particularly in moist, temperate climates. Snails require calcium for their shells, so are less prevalent in areas where this mineral content is low.
The first step is making your yard and garden less desirable for these creatures. Keep the garden clear of debris that offer moist, dark hiding places and be careful about over watering. Keep an eye on ground covers of ivy and succulents, which are snail and slug, habitat. Wait to mulch until the plants are well established or the temperatures are over 70F.
Cultivating the soil around your garden beds frequently will help destroy snail and slug eggs before they hatch. Learn to like ground beetles, garter snakes, moles and shrews because they all prey on slugs. Slugs really love Campanula carpatica, Chinese cabbage, delphinium, gentian, hosta, lettuce, lilies, mustard greens, petunias, marigolds, primroses, strawberries, and trillium. This is the short list they like to eat other things too. Here are a few ways to help discourage slugs and snails from eating your garden:
Invite more birds into your yard by installing a birdbath. Planting a variety of fruit bearing shrubs is a good way to encourage birds to stay in your garden. They have hungry babies and slugs are a wonderful meal. The larvae of some ground beetles and rove beetles eat slugs. You can encourage them to set up house in your garden by providing permanent grass pathways, stones or planks and perennial beds that provide shelter. A garden healthy in organic matter also helps increase their number. Firefly larvae and centipedes will also eat slug eggs.
Put up barriers to slugs’ travels patterns. When slugs and snails travel they secrete a layer of slime which protects their foot and enables them to travel over a variety of surfaces. Using some of the solutions below will help you to keep the pests out of your garden.
- Crushed eggshells. Their edges are too sharp for the slugs to pass over. Wood ashes are caustic to slugs and snails but in limited quantities won’t hurt your flowers.
- Coarse sand, sawdust, human hair, coffee grounds & garden lime barriers are difficult for slugs to cross.
- Copper strips, 10 cm/4 inches wide. Place rings around favorite plants Slugs and snails are said to get an electric shock when their ‘foot’ touches the metal and they can’t cross the barriers.
- Diatomaceous earth sprinkled 3 times a month, more if the rains are frequent. Sand paper, cut a slit to the center and another little circle at the center to accommodate the plant stem. Remains of grapefruit halves turned upside down in the garden and left overnight.
- Raise your garden beds. The surface of a raised bed dries out more quickly from a rainstorm making it a less attractive place for slugs to hang out.
- Hand picking is an excellent remedy. If the slime on the slugs bothers you use gloves.
- The old stand by of beer in yogurt containers works well. Cut a rectangular opening on two sides of the yogurt cup just below the opening. The put the lid on and bury the container with the bottom of the slits just above the soil line.
Varieties of plants that are not attractive to slugs:
agapanthus anemone artemesia amsonia aruncus astilbe monarda begonia some campanulas
rudbeckia dicentra calendula columbine cosmos echinacea daffodills geraniums daylilies coral bells dianthus ferns fox glove nasturtiums oregano lobelia hellebores lavender lamb’s ears poppies rosemary sage santolina sedum sundrops sunflowers violets yarrow There are others that slugs and snails don’t like very well especially plants with tough ever green leaves.
Re-printed with permission from Charlotte’s Gardens.
A wonderful resource for tips on growing a gorgeous garden, making recipes they will rave about at your next get together and the place to find Gourmet Foods & Botanical Beauty Products. http://www.charlottesgardens.com/?rpolMustard and Turnip Greens with Turnips
- 2 bunches mustard greens
- 1 bunch turnip greens with turnips
- 6 slices of bacon
- Salt to taste
- 1 tablespoon sugar (optional)
- Soak all the greens in salt water for 15 minutes. Any unwanted “guests” will die, turn loose and float to the top. Rinse 3 times in fresh water.
- Place greens in a large pot. Peel turnips and cut into 1/2-inch cubes and add to greens. Fill with 2 1/2-inches of water; add salt and begin heating.
- In separate skillet, fry bacon slices (not crisp, just enough to free most of the fat) and add both bacon and fat to the greens. Bring greens to a boil; reduce heat to a simmer and cover. Cook for about 2 hours or until tender. Remove greens to a bowl and using a knife and fork, chop them up, then pour some of the soup (pot-liquor down South) over the greens. Great served with pepper sauce (chili peppers and vinegar).
- Crushed eggshells. Their edges are too sharp for the slugs to pass over. Wood ashes are caustic to slugs and snails but in limited quantities won’t hurt your flowers.