

Organic
Gardening Tips
Terra Viva Organics
Contest
Winner!
Medicinal
Garden (Part I)
Growing
Potatoes in Barrels
No-Till
Gardening
Fruit-Glazed
Acorn Squash
Medicinal
Garden (Part I)
by Sheri
Ann Richerson
Starting a medicinal herb garden may be easier than you
think. With a few selected herbs and a bit of planning
this is a garden that will give you joy for years to come.
Most herbs, including many of the medicinal herbs are
relatively care-free once they are planted and begin to
settle in to their new home.
The first step in planning
your new garden is to decide where it will be, and then
to draw a basic outline of your garden on paper. Then
you must group your plants into their respective groups.
For example, Perennials should always be grown together,
as should Biennials and Annuals. In the long run this
will help you remember where your plants are and avoid
accidentally digging one up.
Let’s begin by taking
a look at some of the choices you will have in medicinal
herbs.
 Agrimony – Agrimonia
Eupatoriais a perennial herb to zone 6 that will
grow two to five feet. This herb prefers light well-drained
soil, and is easily propagated in early spring by seed
or division of older plants. It is susceptible to powdery
mildew however. The dried foliage is the part of the
plant used in medicine.
Aloe – Aloe
Vera is a succulent evergreen perennial to zone
10. It will grow up to a foot tall. It prefers to be
grown in light sandy or gravelly soil with very good
drainage. Propagation is done by removing the baby offsets
from the parent plant and this plant may be propagated
any time of the year. Aloes are susceptible to mealybugs.
The leaf may be peeled or the inner mucilage extracted
and is commonly used for burns. Aloe juice is also commonly
drank for a general tonic and is a bowel regulator.

Angelica – Angelica
Archangelicais a perennial herb that reached five
to eight feet and is hardy to zone 4. The best soil
for this plant is a cool, moist, slightly acidic soil,
and propagation is easiest done by sowing seeds in the
spring. It is susceptible to crown rot and aphids. The
roots, seeds, and leaves of this plant are used medicinally.
It is an expectorant for colds and coughs as well as
being used to treat kidney disorders and as an aid to
the digestive system. For a good stimulator or expectorant,
add three tablespoons of Angelica to one cup of boiling
water, cover and steep for ten minutes.* Terra Viva
Organics is proud to provide Organic
Angelica Seed
Anise– Pimpinella
Anisumis an annual herb that will reach up to two
feet, and prefers to grow in sandy well-drained soil.
Propagation of this plant is easiest done by seed and
it is rarely bothered by pests or diseases. The leaves
and seeds of this plant are used for medicinal purposes.
Commonly used in the treatment of colds and flu, Anise
is a fever reducer and a digestive aid.
Arnica – Arnica
Montana is a perennial herb to zone 6 and will grow
to two feet. This plant prefers dry, sandy acid soil
with humus that is well drained. Propagation is done
by sowing seeds indoors in early spring or by dividing
older plants later in spring. Aphids can be a problem.
The dried flowers and roots of this plant are used for
external medicinal purposes.
There are many medicinal
herbs out there to help you plant the perfect medicinal
garden. We will be taking a more in-depth look at these
herbs in upcoming issues. Please keep in mind that while
using herbal products for health care, serious or prolonged
illness should be attended to by a licensed doctor.
Sheri Ann Richerson–
Garden Writer
*Taken from “Jude’s Herbal
Home Remedies,” by Jude C. Williams, M.H.
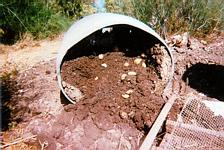
Growing
Potatoes in Barrels
by Phil
Heiple

I originally started doing
this to avoid gophers. I got my hands on four plastic
50-gallon barrels. I drilled drain holes in them, set
them up on blocks and planted spuds in them. Here’s
how: Cut up potatoes which have started to sprout, leaving
an eye or more on each piece. Dry these out for two
days in a cool, dry room. This deters wet rot. Then
plant in a shallow layer of soil and compost in the
bottom of the barrel. As the potatoes grow up, add more
soil and compost.
After they reach the top
of the barrel, I plant a couple of bush beans in each
barrel. This is a companion planting technique. The
beans protect the potatoes against the Colorado potato
beetle, and the potatoes
protect the beans against
the Mexican bean beetle. Horseradish is also good for
the potato and distasteful to pests. But do not co-plant
with onions or garlic. As soon as the potatoes flower
you can find little spuds in the soil. “Thieve” early
potatoes by scratching away the soil and picking out
the spuds. Replace the soil. Remember how many you took
this way when you’re calculating your yield.
When the whole plant dies
back, kick over the barrel for a bountiful harvest.
I have two barrels of red potatoes, one of white russet,
and one of Yukon gold. Toss the dried potato vines on
your compost heap. They contain lots of potash. Potatoes
can be left in the dirt as long as it is dry and not
too warm (but don’t let the sun “green” them). If they
are muddy, toss them in a bucket of water and let the
mud slough off.
Most of the yield will
be little finger- and marble-sized pieces with only
a few medium and large-sized spuds per plant. These
little ones are yummy, however, and the best way to
eat them is to quick-fry them in a skillet.
Phil Heiple has
been gardening since the mid-seventies. He has experimented
with numerous organic techniques including intensive
beds, companion planting, and container gardening. He
has posted his experiences in a series of award-winning
web pages called “Gardening as an Anarchist Plot.” at
http://www.rain.org/~philfear/garden.html
No-Till
Gardening
by Deborah
Turton
No-till gardening is a way to garden without tilling.
It allows your soil to stabilize and maintain a healthy
biodiversity. Tilling disrupts your soil’s natural patterns
and can cause erosion, loss of organic matter, and soil
compression.
You can transform your
tilled garden into a no-till garden simply by marking
off garden beds. You don’t have to raise these beds.
Leave enough room around them for your paths. Then,
walk in your paths, and stay out of your garden beds.
It helps if you have edging around your beds to keep
grass out of the beds. I use rocks as an edging material.
If you are just starting
a garden, you can place cardboard or at least
ten sheets of newspaper directly over your grass
and cover with mulch. Then cut holes in the paper, dig
a hole in the soil and place your plant directly into
this hole. The grass will be smothered under the mulch
and break down, providing a source of nutrients for
your plant. The paper prevents the grass from growing
up through the mulch. If you want to plant seeds, dig
out the grass and roots and fill the area with compost
or soil and plant your seeds.
The following season,
you can plant your transplants and your seeds in your
beds without tilling. You can add amendments to the
surface under a mulch or add them to the hole in which
you are planting. The soil creatures will mix the amendments
into your soil. In the fall, you can use a cover crop,
cover the soil with leaves, or plant a winter crop like
turnips or kale. Just don’t leave your soil bare.
Controlling weeds
with no-till is easy. I spend less than one hour/week
controlling weeds – including laying mulch. I have so
few weeds, I simply pull them as I’m doing other garden
activities.
First:
Place your plants close together. This shades out the
weeds. Generally place your plants the minimum distance
needed in a row, but use this distance in all directions.
So if your peppers need to be placed 12-18″ apart in rows
3′ apart, place your plants 12″ apart. You’ll have 4 plants
in 4 sq ft.
Second:
Use mulch. I can’t emphasize this enough. Mulch smothers
weeds while feeding your plants. Luckily, no-till gardens
use less mulch because of the small growing area. The
time you spend laying mulch once is much less than the
time you’d spend pulling weeds all summer.
Third:
Because you now have permanent paths, the grass seeds
and roots found in your paths won’t be spread to your
garden beds. Tilling paths with grass and weeds spreads
the weed seeds and weed root pieces throughout your garden.
By skipping the tilling, you skip spreading many weeds
to your garden beds. Any unwanted seeds that land on your
mulch will have a harder time germinating, and you can
easily pull up the seedlings.
Deborah Turton
is an organic gardener and writer who’s worked with
a variety of environmental groups.

