
A mini organic garden can give you wonderful vegetables which are pesticide-free and delicious. It is not really necessary to have a large garden area to grow plants or vegetables. All you will ever need in veggies will grow in a reasonably small plot.
The no-dig garden method has been proven successful all over the world. What you need to do is identify the area where you would like to start. Choose an area where there is sunlight, with access to water, mark it out and you are ready to start planning.
What you will need to start:
- Pieces of wood or something to use to box in the area chosen.
- A bale of alfalfa hay
- A bale of straw
- Some old newspapers
- A load of compost
- Manure or a complete organic fertilizer
- A bit of energy, motivation and enthusiasm
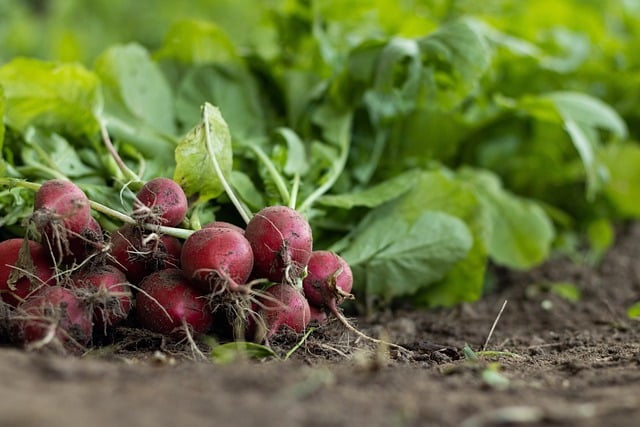
Be thorough with the preparation. Don’t make it big to start, say 10 feet (300 cm) by 5 feet (150 cm) and choose which vegetables you would like to grow. Good choices are lettuce, beans, tomatoes, Swiss chard, and radish.
The site to choose?
Choose an open area, preferably facing north/south. Plenty of sunshine and not much wind are important factors to consider. If you are working on concrete, your windbreak could be shrubs in pots. This is an ideal way to do it as you can move pots around and place them where they will be more effective.
Getting started
Mark out your site and box it in. If it is on concrete, join the boards to make it strong. If it is on ground, do a bit of leveling first. Don’t worry about grass as we are going to cover this over. Even if the ground is rock-hard, this method works. You can build a no-dig garden on any base.
Now that you have the base down, cover the bottom of the box with newspapers. Use complete papers, opened up and overlapped. Tuck the paper under the framework if you are building on an old garden bed. After the paper, cover the bed now with the Lucerne hay and use each layer piece as bedding. This needs to be about 2 inches (50 cm) in thickness. Water this area very thoroughly at this stage.
Sprinkle some of your fertilizer, blood and bone, or even a liquid organic fertilizer over the whole area. Next, we need to add the compost and this needs to be only about 1 inch (25 cm) in thickness over the area. At this stage, rake it over so that the compost is even and flat across this area.
Now, put a layer of straw fairly loosely over the area. Add some more fertilizer. Put another layer of compost on top of this and add some more fertilizer on top again. It’s time now to put the final layer of Lucerne hay, making sure that it is all fairly level.
Buy your seeds or seedlings as its time to plant. This is the most rewarding part of this job, other than the harvesting later on. Make small holes in the hay and plant into the compost, firming the hay around the plants. This hay will act as an insulator and stop any drying out. Alternatively, you could place another layer of compost on top and plant into this.
It’s just a matter of maintenance, watering and waiting for those vegies to come up. You will love the crops of herbicide-free foods.
You’ll wonder why you didn’t start earlier!
by Bill Richardson

Bill Richardson lives in Gippsland in Victoria, Australia and specializes in growing South African bulbs and other species. He is involved in horticultural training and development of programs included organic gardening, worm farming, and bee keeping. He is a member of the International Bulb Society and have photos and some articles on the International Bulb Society page. His specialty area is growing the South African species Ixia.
